Recently, to protect their property at the entrance to a private house or on the doors of apartment buildings began to install intercoms. Having such a device, an unwanted guest cannot enter a house or apartment without your knowledge. Do-it-yourself installation of a doorphone is not such a difficult task. For self-installation, there are several connection schemes, here we will consider the most commonly used configurations.

The difference between a video intercom and a conventional intercom is that when you call to a video intercom, the function of transmitting images from the street is activated at the place where the surveillance cameras are installed. Thus, the owner of the house can not only hear, but also see the visitor - this is an important aspect when considering the safety of life of residents or the house itself. Do-it-yourself installation of a video intercom is not very different in technical parameters from installing a standard audio intercom.
Any modern intercom system must fulfill its main functions and purposes:
- dial from the street to the room;
- high-quality two-way communication between the visitor at the entrance and the owner of the house or apartment;
- the presence of video communications;
- the possibility of remote opening of the lock on the front door.

How to install an intercom: device types
This convenient means of communication can be of two types:
- wired
- wireless.
Wireless analogs are installed quickly, without much effort, after which they are immediately ready for use. Such systems connect to a conventional power outlet or receive power from a small battery. To install a wireless doorphone, a system with the required number of substations that are connected to a wall outlet or battery is selected, after which the settings are made according to the attached instructions. After all the manipulations performed, the device can be used.
Separately, it is worth mentioning the possible problems that you may encounter if you opt for a wireless model.
In wireless intercoms, the main “disease” is a loss of connection with the monitoring device in the event of interference that can be caused by powerful Wi-Fi routers or other wireless radio devices. Therefore, it is extremely important to consider all these factors when tuning, choosing frequencies. Also, if the house has a security service with its own radio communications, then this is another reason that provides interference to the operation of a wireless intercom.
The undoubted “plus” of wired intercoms is that they do not need recharging, they do not face a shutdown if the owner forgets about them for some reason. The wired system is best laid during repair work.
If the decision to install the doorphone with your own hands came much later, then you will have to deal with all the features of the cables that go from the main station to the substations.
How to connect an intercom: basic examples of schemes
DIY wiring diagrams are divided into three categories:
- high complexity
- complex
- ordinary.
Very complex schemes are commonly used in homes with many apartments.
A more simplified version involves connecting in one circuit intercom and lock.
The so-called third variety of circuits is extremely simple, a person will be able to deal with it even with initial skills in electrics.
Connecting an intercom system in a multi-storey building is a complex scheme, which should also be mentioned as an example of connecting a large number of devices into one network. Such global systems have a high cost, which is why they are established by the general monetary investments of all the residents of the house.

The connection diagram of an intercom with an electric lock below is considered standard for equipping communication systems in private homes.

Through this scheme, the intercom and door (gate) electric lock are most often connected to a common circuit.
Knowledge of the basic fundamentals in electrics is enough to make an independent connection to the intercom.
Thus, the receiver itself is located in the room, a pair of cables is laid from it - three-core and four-core. A three-wire cable is necessary when additional installation of a surveillance camera is implied. Also, an alternative can be a single multicore cable, in this case it is necessary to coordinate the connection of the video intercom according to the color of the cores. The wires are connected in turn, according to the scheme. Additionally, through a step-down power supply, it is necessary to supply electricity to the image sensor and the door station call panel.
An example of the following scheme is quite simple. The lock is not provided here, do-it-yourself connection of the intercom is provided with the help of four wires.

In this way, coordination is made between the outdoor call unit and the internal response unit. Two cables are responsible for power supply, the other two are responsible for audio and video signal. The contacts of the indoor and outdoor units are interconnected by a separate wire, which makes it possible to see, hear what is happening outside the gate.
Do-it-yourself doorphone installation: work sequence
Whichever connection scheme you choose, the installation technology, the order of work look about the same. The whole process can be represented in the following stages:
- Cabling.
- Installation of the outdoor unit intercom.
- Installation of the indoor unit.
- Switching wires.
The cable laying, which will connect the external and internal blocks of the intercom, is carried out by the route most convenient for you. In the room, the wire is held through gates or cable channels.
Before installing the intercom in a private house, you need to determine the method of laying outdoors. On the street, an aerial laying based on a tension cable or underground is used.
As for the external method, here it is necessary to take into account the possibility of wire breakage during strong winds, as well as lightning falling into it during a thunderstorm. Underground laying is more expedient, since with proper protection of the wire, observing the PUE (electrical installation rules), the system will work without interruptions, malfunctions.
The cable for underground work must have reliable protection (sheath) from moisture, mechanical damage. For these purposes, wires VVG, PVA, ShVVP are suitable.

The depth of the underground cable should not be less than 0.75 m. Also, as an additional protection, you can use the PND corrugated hose or a special tube.
At this stage, you should take care of the set of tools that you will need when installing the device:
- construction knife;
- insulating tape;
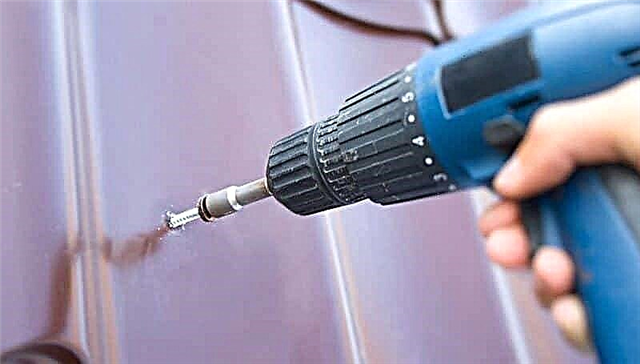
- electric drill;
- pliers;
- self-tapping screws;
- dowels;
- screwdriver;
- special nozzle for electric drill (for shtrobleniya walls);
- alabaster;
- pencil;
- level;
- voltmeter.
Installation of the outdoor unit intercom is carried out in any place convenient for you. More often it is an entrance gate or a fence post near the gate. From a practical point of view, it is not recommended to install the intercom on the gate, since its regular opening, closing leads to rapid wear, subsequent cable breakage.
The fence post, which is located at the entrance gate, looks like a more attractive prospect. For reliability and long-term operation, it is better to place the unit inside a niche specially made for this. A special box is initially installed in it, and the block itself is already placed in it. The specifics of the operation resembles the installation of a conventional electrical outlet and a socket, where all the necessary wires are output.
If the presence of an additional video camera and / or an electrically controlled lock is implied, then five more wires are displayed in the installation box. Two wires will provide electricity to the outdoor unit and the lock system, the other three will work on an additional surveillance camera. These three wires are connected to the indoor unit, however, they can also be let go by the box of the external unit, directly connected to the installation site of the camcorder.

Installation of the indoor unit of the doorphone is facilitated by the fact that it does not require a built-in (hidden) installation. The unit itself is a kind of video phone, which you only need to securely fix (hang) in a pre-selected, convenient place for you. This unit includes two parts - a videophone and a power source, which can be optionally equipped with a battery. The double block can be placed in any desired place, taking into account the wiring from it to the videophone. A thin 12V cable is quite suitable for this purpose.

Before connecting a video intercom, you need to thoroughly study the attached circuit, to understand the principles of switching wires.
If you are faced with a similar question for the first time, you may naturally have difficulties. However, it is worth noting that almost all manufacturers of such equipment always attach to the device a detailed connection diagram, which describes all connection points, terminals, their functions.
At this stage, the main thing is not to mix up the wires and methodically connect one wiring. For example, they took a blue wire, brought it to the terminal of the external, and then the indoor unit, followed by the wire of the next color. Connection is made until all wiring is connected to the places indicated in the circuit, after which the device is checked for operability.

Conclusions
When choosing a place to install the indoor unit, make sure that it is always in sight, or, as they say, at hand. In most cases, it is mounted where the owner spends the greatest amount of time. Often you can see the intercoms in the hallway.
If you carefully study the technical documents attached to the device, study the connection diagrams, then installing a doorphone with your own hands will not be difficult for you.
However, specialists must deal with complex security systems; in such cases, the interaction of a large team of adjusters with experience and thorough knowledge of the technical base is required.